Sewzy
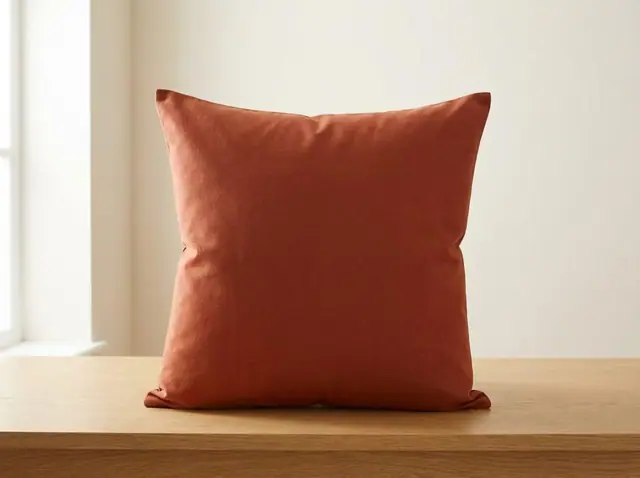
To sew an envelope pillow cover, cut one square front and two back pieces that are a little over half the height of the front. Hem one long edge of each back, lay the backs over the front so they overlap in the middle, sew once around the outside and turn it right side out. No zipper is needed, and a beginner can finish one in about 40 minutes.
TL;DR
- The free Sewzy Envelope Cushion is a beginner pattern with four sizes: 16, 18, 20 and 24 in. It takes about 40 minutes.
- You cut 1 front and 2 backs. Each back gets a ½ in then 1 in fold on one long edge, which is the 1½ in hem.
- The two backs overlap by about 4 in, which is what holds the pad inside.
- One seam goes all the way around at ⅜ in, and the cover is 1 in smaller than the pad so it looks full.
- Medium-weight home-decor cotton, linen, canvas or velvet holds its shape best.
Why is it called an envelope pillow cover?
The back is made of two flaps that overlap like the back of an envelope. You push the pad in through the gap between them, and the overlap closes it again. There is no zipper to set in and no hand-stitched opening to close, so it is one of the most forgiving first projects you can sew. It is also a quick way to change a room: swap covers by season and keep the same pads.
What do you need?
- Fabric: home-decor cotton, linen, canvas, velvet or even an old curtain. Medium weight holds its shape best.
- A pillow pad in the size you are covering.
- Matching thread.
- Optional: 2 buttons for the overlap.
What size should you make?
The cover is made 1 in smaller than the pad on purpose. A cover cut to the exact pad size looks loose and floppy; a slightly smaller one fills out to the corners. These are the four Sewzy sizes.
| Pad size | Finished cover | Fabric |
|---|---|---|
| 16 in | 15 x 15 in | ½ yd |
| 18 in | 17 x 17 in | ⅔ yd |
| 20 in | 19 x 19 in | ¾ yd |
| 24 in | 23 x 23 in | 1 yd |
How do you sew an envelope pillow cover, step by step?
- Wash and press the fabric first. Washing and drying fabric before you cut it shrinks it ahead of time, so the finished cover does not shrink around the pad the first time you wash it.
- Cut. Cut 1 front and 2 backs. Each back is the same width as the front and a little over half its height.
- Hem the backs. On each back, fold one long edge ½ in then 1 in to the wrong side, press and topstitch. This neat edge is the opening of the envelope.
- Layer. Lay the front right side up. Place one back right side down on top, raw edges matching at the top, hem toward the middle. Place the second back right side down, raw edges matching at the bottom. The two hems overlap by about 4 in.
- Sew. Pin and stitch all the way around at ⅜ in. Stitch again over the overlap edges, because that is where the pad pulls hardest. Clip the corners.
- Turn. Turn the cover right side out through the opening, poke out the corners, press, and push the pad in.
The seam allowance is ⅜ in. If you are new to allowances, the guide to seam allowance explains why that small number matters.
Which tips make it look better?
- Use a feature fabric for the front and plain cotton for the backs to save money.
- Topstitch ¼ in around the outside after turning for a crisp edge.
- For a piped edge, baste piping to the front before you layer the pieces.
Common mistakes to avoid
- Overlapping too little. If the backs only just meet, the pad shows through the gap. Aim for about 4 in.
- Layering the backs the same way. One back goes at the top and the other at the bottom, both right side down. If both sit at the top, there is no opening.
- Skipping the second stitch line. The overlap edges take the strain every time you plump the pillow. Sew over them twice.
- Cutting the cover to the full pad size. Keep it 1 in smaller so the cushion looks full.
- Forgetting to clip the corners. Unclipped corners turn out round and lumpy.
What to sew next
If you liked this one, the free Drawstring Bag and Potholder are equally quick, and the Boxed Tote Bag is a good next step. For more first projects, see easy sewing projects for beginners, and for gifts, handmade Christmas gifts to sew. If you are not sure how much fabric to buy for another size, how much fabric do I need shows how to work it out.
How do you choose a pillow pad?
Buy the pad in the size printed on the pattern, not the size of the cover. A 16 in pad goes with the 15 x 15 in cover, so measure the pad you already own across the middle before you pick a size. If your pad is not square, sew a cover for the closest size and plan to try the fit before the final topstitching. Washing the finished cover is easy: because the pad slides out of the envelope back, you never wash the pad with it.
Sources
Washing and drying fabric before cutting is called preshrinking; see the glossary in the Purdue Extension 4-H sewing helper's guide. Pattern sizes, fabric amounts and steps come from the Sewzy Envelope Cushion pattern.
 How to hem pants by hand and by machine6 min read
 How to sew a straight line and smooth curves6 min read
 Thread bunching under fabric? Fix a bird's nest6 min read
 How to sew on a button by hand, and make a buttonhole6 min read