Sewzy
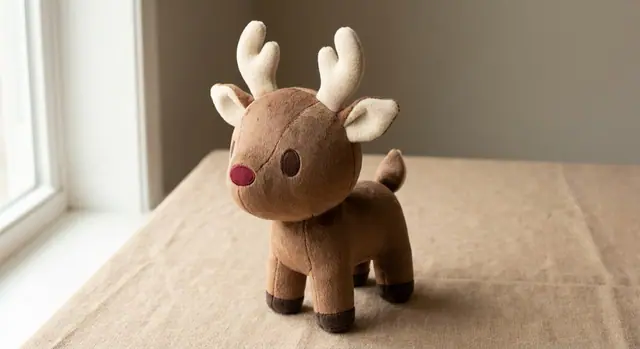
To sew a reindeer plush, cut and sew the face, ears, tail, antlers and hooves first, baste the antlers and ears to the head, then close the head gusset, body and underbody, turn the toy through a gap, stuff it firmly and close the gap by hand. The Reindeer Plush in the Sewzy app comes in three sizes (7, 9½ and 12 in), is rated intermediate and takes about 3 hours.
TL;DR
- Sizes: Small 7 in, Medium 9½ in, Large 12 in.
- Level and time: intermediate, about 3 hours in 12 steps.
- Key skills: sewing small curves, catching the antlers in the head seam, turning and stuffing, closing with a ladder stitch.
- Safety: use embroidered or very securely attached eyes and nose, especially if the toy is for a baby or toddler.
- Price: Premium, in the Sewzy app. The app gives the fabric amounts for each size.
Sew the Reindeer Plush from this guide, step by step, in the Sewzy app
Pick your size, print it from your phone, and follow every step with a sewing coach beside you.


What makes a reindeer plush different from other stuffed animals?
A reindeer has more small parts than a simple bear or bunny: two ears, a tail, a pair of antlers and four legs with flat soles. Each of those small parts is sewn separately, turned, and then caught into a larger seam. That is why this project is rated intermediate. The sewing itself is only straight stitching and gentle curves, but the order matters, and the Sewzy pattern walks you through it so nothing gets trapped in the wrong place.
It is also one of the nicest Christmas makes to give, because it stands up on a shelf or mantel and works as decoration first and a toy second. If you want more ideas for the season, see the Christmas sewing patterns collection and our guide to reindeer and angel sewing patterns.
Which size should you make?
| Size | Height | Good for |
|---|---|---|
| Small | 7 in | Ornament, stocking stuffer, gift topper |
| Medium | 9½ in | Shelf or mantel decoration, small gift |
| Large | 12 in | The easiest size to turn and stuff firmly |
Small pieces are harder to turn and stuff, so beginners to plush making often find Medium or Large easier to handle, even though the steps are the same. Fabric amounts differ for each size, and the app lists them so you can buy exactly what you need.
What fabric and supplies do you need?
- Body fabric: felt, fleece, minky or a sturdy cotton in brown, tan or cream. Felt and fleece do not fray and are the most forgiving.
- Antlers and hooves: a contrast fabric, such as tan, cream or dark brown felt.
- Face: embroidery floss for the eyes and nose. A red or dark nose is the classic choice.
- Stuffing: polyester fiberfill.
- Thread: matching thread, plus a hand needle for closing the gap.
- Tools: small sharp scissors for clipping curves, a turning tool or chopstick, and clips or pins.
The app lists the fabric amounts for every size, so check there before you cut into anything.
How do you sew a reindeer plush step by step?
The app breaks the project into 12 steps. Here is what happens in each, with the checkpoint each one ends on.
- Print and cut. Print the pattern, cut every piece and snip the notches. Done when all pieces are cut and the notches are marked.
- Sew the face. Sew the two eyes and the nose onto the face pieces. Doing this while the pieces are still flat is far easier than adding them to a stuffed head. Done when you have 2 sewn eyes and 1 sewn nose.
- Ears and tail. Sew the ears and the tail right sides together, leaving the base open. Clip the curves, turn them right side out and press if the fabric allows. Done when you have 2 ears and 1 tail with the base open.
- Antlers. Sew the antler pieces right sides together, clip into the curves, turn them right side out and use a chopstick to push out the tips.
- Hooves. Sew the hooves onto the leg pieces. Done when 8 hooves are sewn on.
- Antlers and ears on. Baste an antler and an ear to each side of the head with the raw edges matching, so they sit inside the seam allowance. Done when an antler and an ear are basted on both sides.
- Head gusset. Sew the gusset to the head pieces. The antlers and ears are caught inside the seam, so pin them out of the way of the stitching line. Done when you have one head with the antlers caught in the seam.
- Back and front seams. Sew the body halves together at the back and front, leaving one gap open for turning. Done when the body is closed with only the gap open.
- Underbody. Sew in the underbody, which closes the belly and the legs. Done when the belly and legs are closed.
- Soles. Sew a flat sole into the bottom of each leg so the reindeer can stand. Done when all 4 legs have flat soles.
- Turn and stuff. Turn the toy through the gap and stuff it, starting with the legs and the head. Done when you have a firm reindeer that stands.
- Close and finish. Close the gap with a ladder stitch, pulling the thread snug so the stitches disappear.
How do you sew small curves cleanly?
The ears, hooves and antler tips are all tiny curves, and they are where most plush projects look lumpy. Three habits help:
- Sew slowly and stop with the needle down. At each tight curve, lift the presser foot and pivot a few degrees at a time instead of forcing the fabric around.
- Shorten the stitch. A shorter stitch length gives a smoother curve and a stronger seam on small parts.
- Clip the curves. Snip small notches into the seam allowance of curved seams, up to but not through the stitching, so the curve can open out smoothly when turned. Trim tight points close to the stitching too.
For a longer walkthrough, see how to sew a straight line and curves.
How do you stuff a reindeer so it stands up?
Stuff the legs first and pack them firmly, because the legs hold the toy up. Use small tufts of fiberfill rather than big handfuls, and push each one into place with a chopstick or the blunt end of a pencil. Work next into the head and antler bases, then fill the body last. Squeeze the toy as you go: it should feel firm, not squishy, and you should not see stuffing lumps through the fabric. Underfilled legs are the most common reason a plush topples over.
When the shape is right, close the gap with a ladder stitch. If you have never done one, the beginner plush guide how to sew a plushie and how to sew a stuffed animal by hand cover it in detail.
Is a reindeer plush safe for babies and small children?
Plush toys carry a safety responsibility. For babies and toddlers, use embroidered eyes and an embroidered nose instead of buttons or hard plastic parts, and stitch every small piece on securely. The ears, tail, antlers and hooves are all sewn into seams in this pattern, but check them after finishing by tugging gently. If the toy is meant for a child under three, keep it as a decoration out of reach, or make it only if you are confident every part will stay put. Wash-and-wear fabrics such as fleece suit toys that will be handled a lot.
Common mistakes
- Adding the face after stuffing. Sew the eyes and nose while the face is flat, as in step 2.
- Letting antlers shift in the seam. Baste them first, then pin them flat toward the center so the gusset seam does not catch the wrong layer.
- Skipping the clipping on curves. Unclipped seams pucker and make bumps.
- Understuffing the legs. A reindeer that cannot stand loses most of its charm.
- Closing the gap too early. Check the shape and firmness first, then close.
Where to go next
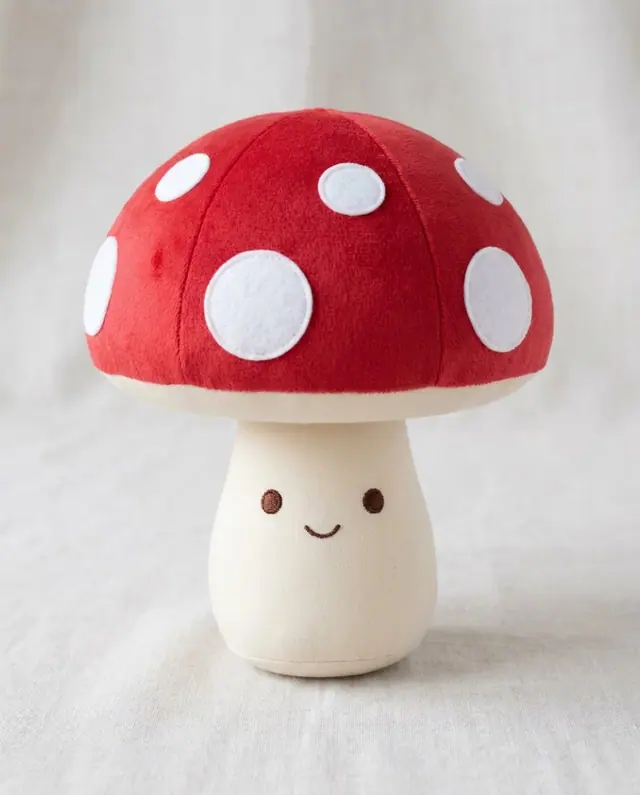
If you want more soft toys, browse the plushie sewing patterns, such as the frog plush and the mushroom plush. For other holiday projects, try the Christmas stocking or the stocking stuffers to sew list.
 10 gifts to sew for teachers (desk to classroom)6 min read
 How to topstitch: a beginner's guide to straight lines6 min read
 How to sew with minky without the mess (beginner guide)7 min read