Sewzy
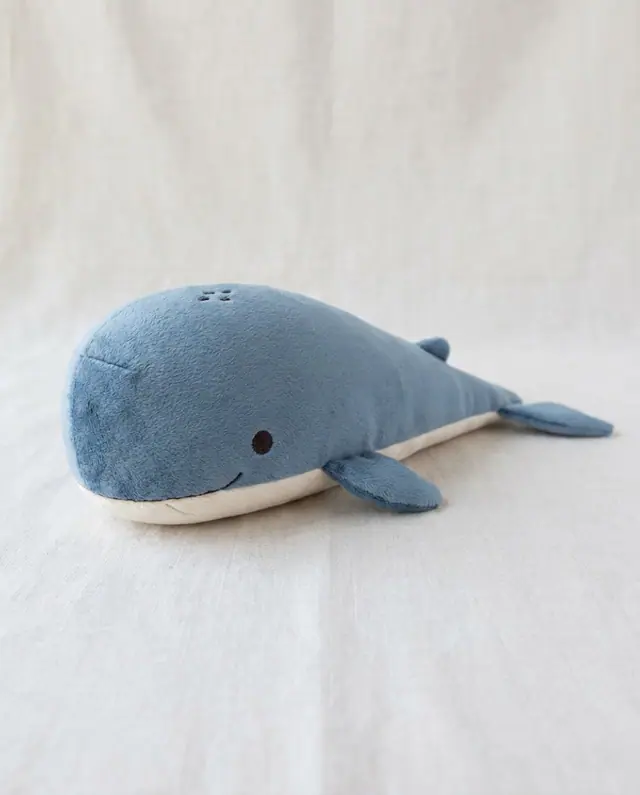
To sew a stuffed animal by hand, cut the pieces, pin them right sides together, sew the seams with a small backstitch, turn the toy right side out, stuff it, and close the gap with a ladder stitch. You do not need a sewing machine. A hand-sewn plush takes longer, but the stitches are just as strong when they are small and close together.
TL;DR
- Two stitches do the whole job: backstitch for seams, ladder stitch to close the gap.
- Use a strong thread, a sharp needle and small stitches, about ⅛ inch long.
- Felt, fleece and quilting cotton are the easiest fabrics to sew by hand.
- The seams in these Sewzy plush patterns can be sewn by hand with a backstitch. Try the Plush Whale, Sleeping Duck or Sitting Frog Plush. These are Premium patterns in the app.
- Expect hand sewing to take longer than the times listed in the app.
What do I need to sew a stuffed animal by hand?
- Fabric: felt, fleece, corduroy or quilting cotton for a first toy. Minky and velour feel lovely but stretch.
- Thread: strong thread in a color that matches the fabric. Cotton-wrapped polyester works well. Double it for extra strength.
- Needles: a sharp hand-sewing needle for seams, and a longer doll needle for eyes and faces.
- Stuffing: polyester fiberfill.
- Tools: pins or clips, scissors, a chopstick to turn out small parts and push in stuffing, and a water-soluble pen to mark the lines.
- Eyes: safety eyes, or embroidered eyes for babies.
Which stitches do I need?
Backstitch for the seams
Bring the needle up, take a small stitch backward, then bring the needle up one stitch length ahead. Each new stitch starts where the last one ended, so the thread forms a solid line, like a machine stitch. Keep the stitches about ⅛ inch long and sew on the seam line, which is the seam allowance in from the edge.
Ladder stitch to close the gap
Fold the edges of the gap in so the fold lines match. Pass the needle through the fold on one side, then straight across and through the fold on the other side, and repeat. The thread forms little ladder rungs. Pull gently every few stitches and the gap closes with no visible seam.
Whipstitch for small parts
Use whipstitch only where a seam will be hidden, such as attaching a felt fin or a patch.
How do I sew a stuffed animal by hand, step by step?
- Print and cut. Cut every piece and snip the notches. Notches tell you where parts line up.
- Mark the face and parts. Mark eyes, smile and fins with a water-soluble pen before you sew the body.
- Sew the small parts first. Feet, fins, wings or tails are easier to turn when they are not yet attached.
- Join the body. Pin the pieces right sides together and backstitch the seams. Go slowly around curves and clip into inner curves so they turn smoothly.
- Add the base or belly piece. Leave the gap open, usually on the underside.
- Turn right side out. Use a chopstick to push out the small parts. If the toy has safety eyes, fit them before you stuff.
- Stuff. Add small pieces at a time, starting in the farthest parts. Stuff firmly, because stuffing settles with time.
- Close the gap. Close it with a ladder stitch and knot the thread inside.
- Finish. Add any last details, such as fins or a blowhole.
Which plush pattern is easiest to sew by hand?
All three below are rated intermediate in the Sewzy app. They are listed by the app's estimated time, from shortest to longest.
| Plush | Time | Sizes listed in the app |
|---|---|---|
| Plush Whale | About 120 minutes | Small 8 inches, Medium 12 inches, Large 16 inches |
| Sleeping Duck | About 150 minutes | Small 12½ inches, Medium 15¾ inches, Large 19 inches |
| Sitting Frog Plush | About 150 minutes | Small 6 inches, Medium 8¾ inches, Large 13 inches |
The Plush Whale is a good first choice: it has the shortest estimated time and uses curved seams, a belly piece and an inset tail fluke, and it includes a ladder stitch to close the gap. Its seam allowance is ¼ inch (6 mm), which suits hand sewing. For the smallest and the largest sizes, remember that a tiny 6 inch frog has little parts that are fiddly to turn by hand, so a Medium size is easier for a first try.
Tips for neat hand-sewn plush
- Make small, even stitches. Large stitches show stuffing and weaken the seam.
- Pull the thread snug, but do not pucker the fabric.
- Use clips on thick fabric. Pins are harder to push through fleece.
- Stitch twice at stress points. Go over the neck and base seams again.
- Clip before you turn. Clip the inner curves first so the seam does not tear when you turn.
- For babies, embroider the eyes instead of using safety eyes.
Common mistakes
- Skipping the backstitch. A running stitch is weaker and can pull out.
- Under-stuffing. A floppy plush looks sad. Add stuffing until the toy holds its shape.
- Closing with a straight stitch. A ladder stitch hides the seam.
- Choosing stretchy fabric first. Stretch makes pinning harder. Start with felt, fleece or cotton.
What to read next
The general guide how to sew a plushie covers fabric, eyes and stuffing in more detail, and the plushie sewing patterns page lists all the stuffed animals. If you want a gentler warm-up, try easy sewing projects for beginners. Download Sewzy on the App Store to get the plush patterns.
 How tall is a porch goose? Standard sizes explained5 min read
 How to sew a jester hat: sizes, steps and tips6 min read
 How to sew quilted fairy, dragon and butterfly wings6 min read
 How to sew a superhero cape for kids in 45 minutes6 min read