Sewzy
Sewzy
A plushie is a few curved pieces sewn right sides together, turned through a gap, stuffed and closed with a ladder stitch. Most take two to three hours of sewing. Here is each step, from fabric to the last stitch.
Choose your fabric
For a first plushie, a soft cotton or flannel is friendly and cuddly. Cotton is the easiest to handle because it does not stretch. Minky and fleece feel soft, but they slide and stretch, so they are better for your second or third plushie. Whatever you choose, pre-wash it and press it flat.
If the plushie is for a baby or small child, use safe materials intended for toys and sew features securely. Embroidered eyes are safer than buttons for little ones.
Gather what you need
- Fabric, thread and a sharp needle
- Toy stuffing (polyester fiberfill is common)
- Clips or pins
- A chopstick or turning tool
- Embroidery thread or safety eyes for the face
- Fabric marker or chalk
Cutting and marking
Cut each piece exactly on the line. Plushies are made of curves, and small errors show in the final shape. Transfer every mark from the pattern, including notches and openings for turning. If you skip the marks, the pieces can end up misaligned.
Sewing curves
Curves are the heart of plush sewing. Use a shorter stitch length, about 2 mm, so the seam is strong enough for stuffing. Sew slowly. Stop with the needle down and lift the presser foot to turn the fabric as you go around the curve.
Backstitch at the start and end of every seam, and leave the opening unsewn. That gap is where you will turn the toy right side out and stuff it.
Clip the seam allowances
Before turning, snip into the curved seam allowances, taking care not to cut through the stitching. For outward curves, cut small wedges out. For inward curves, cut small straight snips. This lets the curve lie smooth when turned.
Turn and shape
Turn the pieces right side out through the opening. Use a turning tool to push the small parts, like ears or paws, all the way out. Do not use anything sharp. Give the seams a gentle press with your fingers, or with an iron if the fabric allows.
Stuffing
Pull the stuffing into small pieces and add it a little at a time. Push each handful into the small parts first, such as the limbs and the nose, then fill the body. Lumpy plushies come from big clumps. Keep checking the shape from the front and the side.
Stuff firmly. Plushies compress with use, so a slightly firm toy keeps its shape longer. But stop before the seams start to strain.
Close with a ladder stitch
The ladder stitch makes the closing nearly invisible:
- Fold the raw edges of the opening inward and pin them.
- Tie a knot in a length of strong thread and bring the needle out through the fold.
- Take a small stitch in the fold on the opposite side, then a small stitch directly across.
- Continue, making the stitches look like rungs on a ladder.
- Pull the thread gently to close the gap, then knot and bury the end.
Add the face and details
Put the face on after stuffing or before closing, depending on the pattern. Place the eyes with pins and look at the toy from a distance. Moving them a few millimeters changes the expression completely. Embroider small details like noses and mouths with a short, tidy stitch.
Which plushie should you start with?
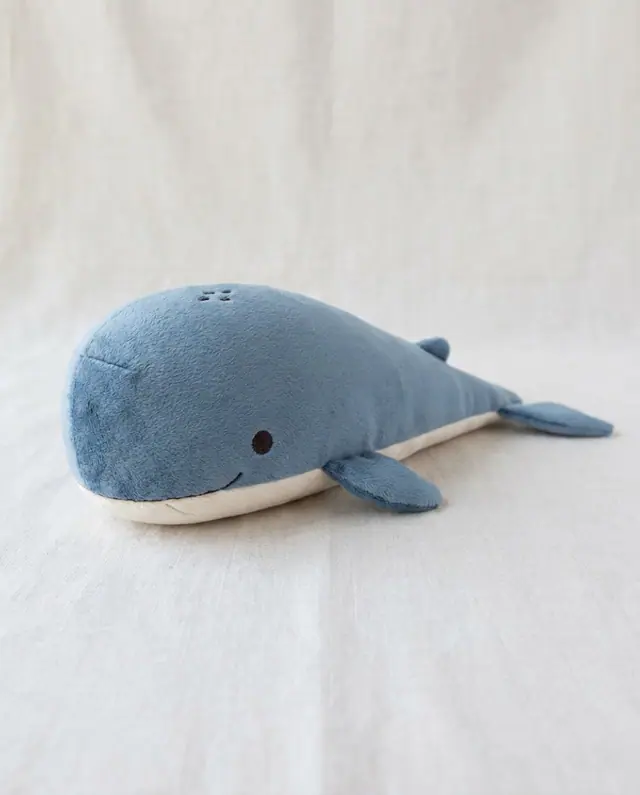
Pick a simple shape with few pieces. All the Sewzy plushies are rated intermediate. The Plush Whale is the quickest, at about 2 hours, so it makes a good first one, and the Snail Plush and Mushroom Plush are fun next steps. Keepsake projects like the Memory Bear come in many sizes and take more time.
How long does it take to make a plushie?
Sewzy's eight stuffed animal patterns take about 2 to 3 hours each, and the five memory animals take about 4 hours. These are the sewing times listed on the patterns, so add some time for printing, taping and cutting:
- About 2 hours: the Plush Whale.
- About 2½ hours: the Sitting Frog Plush, the Bat Plush and the Sleeping Duck Plush.
- About 3 hours: the Capybara Plush, the Mushroom Plush, the Snail Plush and the Reindeer Plush.
- About 4 hours: the Memory Bear and the other memory animals.
Plan a little longer for your first plushie. You can stop between steps, so cutting one day and sewing the next works well.
Make it with Sewzy
Sewzy has 13 plushie and stuffed animal patterns, from a frog and a capybara to the memory bears, each in several sizes with a written step-by-step guide. The AI sewing coach can help when a curve gives you trouble. Get Sewzy on the App Store and try the Plush Whale first.
FAQ
What is the best fabric for a first plushie?
Soft cotton or flannel. They do not stretch, so curves are easier to sew. Minky and fleece slide and stretch, so save them for later projects.
What stitch length should I use for plushies?
About 2 mm, a short stitch, so seams stay strong when stuffed.
How do I close the opening neatly?
Use a ladder stitch. Fold the raw edges in, then sew small stitches across from side to side and pull gently to close.
Are plushies safe for babies?
Use materials made for toys, sew every part securely and prefer embroidered eyes over buttons or hard parts. Check the toy regularly for loose parts.
How long does it take to make a plushie?
Sewzy's eight stuffed animal patterns take about 2 to 3 hours each. The Plush Whale is about 2 hours, the Sitting Frog, Bat and Sleeping Duck are about 2½ hours, and the Capybara, Mushroom, Snail and Reindeer are about 3 hours. The memory animals, such as the Memory Bear, take about 4 hours. Plan a little longer for your first one.
 What is a PDF sewing pattern and how does it work?7 min read
 How to sew a scrunchie in 15 minutes (free pattern)5 min read
 What size sewing pattern do I need?6 min read
 How to find a sewing pattern from a photo5 min read