Sewzy
To press a seam, set the iron down on it, lift it, and move to the next spot, instead of sliding it back and forth. First press the seam flat exactly as you sewed it to set the stitches, then press it open or to one side from the wrong side, and finish from the right side with a pressing cloth if the fabric shines or scorches easily. Pressing after every seam is what makes a handmade project look neat.
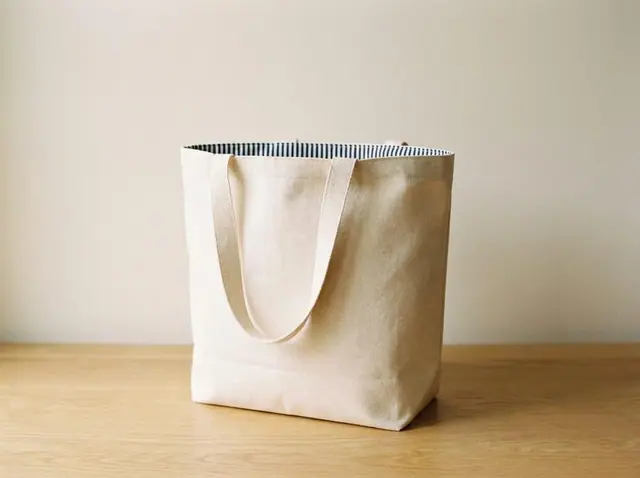
Get the pattern: Boxed Tote Bag sewing pattern (free PDF), with every size and a step-by-step guide.
TL;DR
- Pressing is lifting and lowering the iron. Ironing is sliding it. Press seams so you do not stretch the fabric.
- Press the seam flat as sewn first, then open it or fold it to one side.
- Press open for less bulk. Press to one side when you will topstitch or when seams cross.
- Use a tailor's ham or a rolled towel for curves, and a seam roll or rolled towel for narrow tubes.
- Match the heat to the fiber and use a pressing cloth on delicate fabric. When in doubt, test on a scrap.
- If the fabric cannot take heat, finger press and use a clip.
Sew the Boxed Tote Bag from this guide, step by step, in the Sewzy app
Pick your size, print it from your phone, and follow every step with a sewing coach beside you.


What is the difference between pressing and ironing?
Ironing is the sliding motion you use to remove wrinkles from a shirt. Pressing is a straight up and down motion: place the iron on the fabric, hold it for a moment, lift it and place it somewhere else. Sliding pulls on the threads, and on knits, bias edges and curved seams it stretches the fabric out of shape. Pressing does not, so it is the right motion for sewing.
Why press seams as you sew?
A seam that is pressed as you sew is flat, crisp and easy to cross with the next seam. Once a seam is sewn into the next one, you cannot get an iron to the fabric inside it. A pressed seam also lets you see whether the stitching is straight before you build on it. This is why the care note on the free Boxed Tote Bag and Envelope Cushion patterns in the Sewzy app says to press every seam as you go.
How do I press a seam, step by step?
- Press it flat as sewn. Lay the seam on the board exactly as it came off the machine, with the two layers still together, and press along the stitching. This sets the stitches and melds the thread into the fabric so the seam lies smoother.
- Open the layers. Lift the top layer and flip it back so the seam allowance is exposed from the wrong side.
- Press open or to one side. To press open, use the tip of the iron to push the allowances apart and press them flat. To press to one side, fold both allowances the same way and press.
- Press from the right side. Turn the piece over and press again. If the fabric shows shine, use a pressing cloth, which can be a piece of clean cotton.
- Let it cool. Leave the fabric on the board for a moment before you move it. The shape sets as it cools.
Should I press seams open or to one side?
| Press open when | Press to one side when |
|---|---|
| You want a flat finish with less bulk, as on side seams | You will topstitch along the seam, which holds the allowance in place |
| The seam will be pressed over a curve, after clipping | Two seams cross, so you can nest them |
| The fabric is thick, such as canvas or denim | The seam needs extra strength, as in a quilt |
| The seam allowance would show as a ridge under another layer | The two allowances are finished together with a zigzag or a serger |
When pressing to one side, press toward the piece that will be topstitched, or toward the darker fabric so shadows do not show through.
How do I press curved seams and small pieces?
Flat boards cannot support a curve. Press curved seams over a tailor's ham, which is a firm cushion shaped like a ham, or over a tightly rolled towel. Clip or notch the seam allowance first so it can spread, then press it over the curve from the wrong side. A dart also gets pressed over a ham, so its shaping stays. For narrow tubes such as straps or sleeves, press open over a seam roll, which is a firm cylinder, or a rolled towel, so the allowance does not leave a ridge on the right side.
The tote bag strap is a good example. The pattern has you fold a strip in half lengthwise and press, open it and press both edges to the center, then fold again and topstitch both long edges. The pressing is what holds the shape for the topstitching.
What heat and steam should I use?
Match the iron to the fiber, and always follow the fabric label.
- Cotton and linen: a hot iron with steam.
- Wool: a medium heat with steam and a pressing cloth. Press from the wrong side.
- Silk: a low heat, and often without steam, since water can leave marks.
- Polyester, nylon and other synthetics: a low heat. A hot iron can melt them.
- Rayon: a medium heat from the wrong side.
- Velvet: never press it face down on a bare board, which crushes the pile. Steam it from the back, hold the iron just above the fabric and let it dry.
If you are not sure, test a scrap. Steam relaxes fibers and helps seams lie flat, but it can shrink some fabric, so wash and press fabric before you cut.
Fusible interfacing has its own rules. Follow the instructions on the roll for heat, steam and time, and press without sliding so it fuses evenly.
What is finger pressing?
Finger pressing means opening a seam by running your thumbnail down it. It is useful when there is no iron nearby, for quilting small pieces, or when the fabric cannot take heat, such as vinyl, some minky and plush. Follow it with a clip or a few minutes of weight on top. It is not as crisp as an iron, but it keeps the seam from curling. Finger pressing also works in tight spots, like the inside of a small bag.
Common mistakes
- Sliding the iron. It stretches knits and bias edges. Press down and lift instead.
- Skipping the flat press. Without it, the stitches stay puffy and the seam does not lie flat.
- Pressing too hot. Synthetics melt and wool shines. Use a cloth and the lowest heat that works.
- Pressing on the right side first. It can leave a shine. Start from the wrong side.
- Leaving a ridge. A seam allowance can show through on the right side. Use a seam roll or slip a strip of paper under it.
- Not pressing before topstitching. Seams that are not pressed topstitch crooked. See how to sew a French seam for a seam that is pressed twice.
- Skipping the pressing cloth on dark fabric. Dark fabrics shine easily.
Which tools do I need?
An iron with steam, a pressing surface, a pressing cloth, a tailor's ham and a seam roll cover almost everything, and a rolled towel can stand in for the last two. See sewing tools for beginners for the rest of a basic kit. If your seam allowance is not even, read seam allowance explained, since an even allowance presses flat much more easily.
Which project should I practice pressing on?
Start with the free Envelope Cushion, a beginner project that takes about 40 minutes. Each back piece has a hem folded ½ inch then 1 inch and pressed before it is topstitched, and the cushion is pressed again after turning to flatten the corners. The Boxed Tote Bag takes about 90 minutes and gives you straps, a pocket edge and a top edge to press. Both are in the free sewing patterns collection.
 Baby's first Christmas gifts to sew: 7 handmade ideas7 min read
 Memory bunny pattern: sew a keepsake bunny from clothes8 min read
 Secret santa gifts to sew: 8 ideas in 10 to 60 minutes6 min read