Sewzy
On light, thin fabric, the easiest way to transfer an embroidery pattern is to tape it to a bright window or a light box, put the fabric on top and trace the lines with a water-soluble pen. On dark, thick or stretchy fabric, where you cannot see through, print or trace the design onto sticky water-soluble stabilizer, stick it on, stitch through it and rinse it away, or use white dressmaker's carbon paper. Whatever you choose, test the marker on a scrap first.
TL;DR
- Light fabric: trace through it on a window or light box with a water-soluble pen.
- Dark fabric: use sticky water-soluble stabilizer, white carbon paper or a white chalk pencil. Blue water-soluble pens do not show.
- Clothes, towels and fleece: stabilizer or tissue paper, because markers do not draw well on stretchy or fuzzy fabric.
- Rinse out water-soluble marks before you iron, because heat can set them.
- Heat-erasable pens are quick, but lines can come back in the cold.
Which transfer method should you use?
| Method | Best for | How it comes off | Watch out for |
|---|---|---|---|
| Window or light box and a water-soluble pen | Light, thin cotton and linen | Cold water | Heat can set the marks |
| Heat-erasable pen | Light fabric, quick projects | Heat from an iron or hair dryer | Lines can come back in the cold; pale marks on dark fabric |
| Carbon (transfer) paper | Light and dark smooth fabric | Brushing or washing, depending on the paper | Smudges as you handle the fabric |
| Sticky water-soluble stabilizer | Dark, thick, stretchy or textured fabric, ready-made clothes | Soaking in water | The piece must be soaked to remove it |
| Tissue or tracing paper | Towels, fleece, velvet, dark fabric | Tearing away | Small bits caught under stitches |
| Iron-on transfer pen or pencil | Repeating one design on light fabric | Usually does not come off | Prints a mirror image; stitches must cover every line |
Trace on a window or light box
This is the simplest method and needs nothing special if your fabric is light and thin enough to see through.
- Print the design at the size you want to stitch. Print at actual size so it comes out the right size, the same way you would print a sewing pattern (see how to print PDF sewing patterns).
- Tape the pattern to a window in daylight, or onto a light box.
- Tape the fabric over it, right side facing you, with the design where you want it. Press the fabric first so it lies flat.
- Trace with a fine water-soluble pen in light, steady lines, on or just inside the printed lines so the stitches will cover them.
A tablet showing a plain white screen at full brightness can stand in for a light box for small designs. Do not press hard on the screen.
Water-soluble pens
Water-soluble fabric pens, usually blue, draw a clear line that disappears with cold water. When the stitching is done, rinse the piece or dab the lines with a damp cloth, then let it dry. Do not iron the fabric or leave it in hot sun before the marks are gone, because heat can set them. Purple air-erasable pens fade on their own within hours to a few days, which is handy for a quick project and frustrating for a slow one.
Heat-erasable pens
Heat-erasable gel pens draw a fine, smooth line that vanishes when you touch it with an iron or a hair dryer. They are quick and pleasant to use. The catch is that the ink becomes invisible rather than being removed: lines can reappear if the piece gets very cold, and on some fabrics, especially dark ones, they can leave a faint pale line. Test on a scrap of the same fabric, and use them where your stitches will cover the lines completely.
Carbon or dressmaker's transfer paper
Lay the fabric on a hard, smooth surface, put the transfer paper on it colored side down, then the pattern on top, and tape the layers so nothing shifts. Trace over the lines with a ballpoint pen or a stylus, pressing firmly. Use white or yellow paper on dark fabric and blue or red on light fabric. Some transfer papers brush off easily, so transfer the design just before you stitch and handle the hooped fabric as little as you can.
Water-soluble stabilizer
Sticky water-soluble stabilizer is the most reliable method for anything you cannot trace through, and it comes in sheets you can print on at home.
- Print or trace the design onto the stabilizer.
- Peel off the backing and smooth the stabilizer onto the right side of the fabric.
- Hoop and stitch through both layers. It can feel slightly sticky on the needle, and a sharp needle helps.
- Trim away the extra stabilizer around the design.
- Soak the piece in lukewarm water until the stabilizer dissolves, rinse until the fabric no longer feels slippery, then lay it flat to dry.
Because the design sits on top of the fabric, it works on dark colors, denim, knits, towels and textured weaves alike. It also gives a stretchy tee a little support while you stitch. The only limit is that the finished piece has to be soaked, so skip it on anything that should not get wet.
Tissue paper or tracing paper
Trace the design onto tissue paper or thin tracing paper, pin or baste it to the fabric, and stitch through the paper. When you finish, tear the paper away gently, holding the stitches down with a finger, and pick out small bits with tweezers. It is a good choice for towels, fleece and velvet, where pens drag or disappear into the pile.
What works best on dark fabric?
You cannot see a pattern through dark fabric, and blue water-soluble pens barely show on it. In order of reliability:
- Sticky water-soluble stabilizer, because the fabric color does not matter at all.
- White or yellow carbon paper for smooth fabrics and clean line designs.
- A white chalk or charcoal pencil for simple shapes. It rubs off as you work, so redraw as you go.
- Tissue paper for fuzzy or textured fabric.
Getting the placement right
Find the center of the area, mark it with a pin, and line up the center of the design with it. On a ready-made tee or shirt, try it on and pin where you want the design before you mark anything.
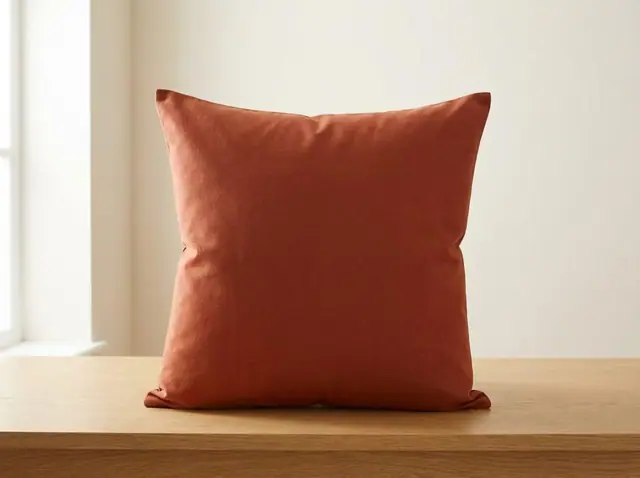
If you are sewing the item yourself, transfer and stitch the design on the cut piece before you sew it together, while it is flat and easy to hoop. Keep the design at least an inch inside the edges, clear of the seam allowance, and away from boxed corners and strap positions on a bag. The front of an Envelope Cushion or the outer panel of a Boxed Tote Bag is a good first canvas, and both are free in the Sewzy app. Their how-tos are in how to sew an envelope pillow cover and how to sew a tote bag with boxed corners.
Once the design is on, pick your stitches in embroidery stitches for beginners. For tees and denim, see how to embroider clothes and bags, and for the basic kit, embroidery supplies for beginners.
 Winter sewing projects: 14 cozy things to make6 min read
 How to sew fabric Christmas ornaments (4 shapes)6 min read
 Gifts to sew for men: 10 things he will actually use6 min read
 How to sew a baby bib (free pattern)5 min read