Sewzy
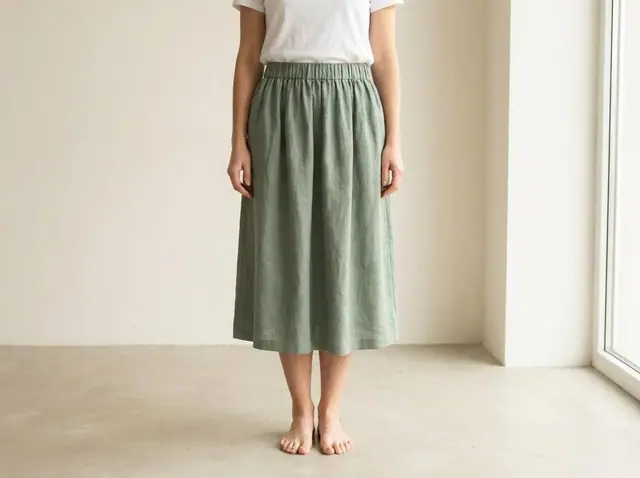
To sew an elastic waistband, fold the top edge of the fabric down twice to make a casing a little wider than the elastic, stitch it down leaving a 2 inch gap, thread the elastic through with a safety pin, overlap the ends and stitch them, then close the gap. Cut the elastic about 2 inches shorter than your waist for the Sewzy patterns.
TL;DR
- A casing is a tunnel of folded fabric. The elastic runs through it, and the fabric gathers when you let go.
- The free Sewzy Elastic-Waist Skirt and Sleep Shorts both use 1½ inch wide non-roll elastic, cut to your waist minus 2 inches.
- Finish the raw top edge, then fold it down ½ inch and again 1¾ inches. Stitch close to the inner fold and leave a 2 inch gap.
- Overlap the elastic ends by 1 inch and stitch a square, then ease the join back inside and close the gap.
- The skirt takes about 90 minutes and the shorts about 60 minutes, and both are rated beginner.
What is an elastic waistband casing?
A casing is a folded-over strip at the top of a skirt or pants. You stitch along its lower edge to make a tunnel, then push elastic through it. It is the easiest waistband to sew, because there is no zipper, no button and no waistband piece to cut. It is why an elastic skirt is a popular first garment.
What do you need?
- Elastic: 1½ inch wide non-roll elastic. Non-roll means it keeps its shape instead of curling into a rope inside the casing.
- Fabric: light to medium woven fabric with some drape, such as cotton lawn, linen, rayon challis, double gauze or chambray. Stiff or thick fabric makes the gathers bulky.
- Tools: matching thread, a safety pin or bodkin, and an iron. If you are choosing a needle, see the needle and thread guide.
How long should the elastic be?
For the Sewzy patterns, cut the elastic to your waist measurement minus 2 inches. That is snug enough to hold the garment up, and still loose enough to pull on over your hips without a zipper. The pattern step in each case is the same: measure your waist, subtract 2 inches, and cut.
It is better to start a little long and test it than to cut it short. You can try it around your waist before you stitch the ends, and trim if it is too loose.
How to sew an elastic waistband, step by step
- Finish the top edge. Zigzag or overlock the raw top edge so it does not fray inside the casing.
- Fold and press. Fold the top down ½ inch, then fold it down again 1¾ inches along the waist line. The second fold is a little wider than the 1½ inch elastic, so the elastic can slide through. Press well.
- Stitch the casing. Sew close to the inner folded edge, all the way around. At one side seam, stop and leave a 2 inch gap. Backstitch at both ends of the gap.
- Thread the elastic. Clip a safety pin to one end of the elastic and feed it through the gap and around the casing. Keep the elastic flat, with no twists, and hold the other end so it does not disappear inside.
- Join the ends. Overlap the two ends by 1 inch and stitch a small square, then add a cross in the middle for strength.
- Close the gap. Ease the join back inside the casing and stitch the 2 inch gap shut. Spread the gathers evenly around the waist.
- Hem and press. Finish the hem, then press the whole garment.
Which projects use an elastic waistband?
| Pattern | Rated | Time | Free? |
|---|---|---|---|
| Elastic-Waist Skirt | Beginner | 90 minutes | Yes |
| Sleep Shorts | Beginner | 60 minutes | Yes |
Both patterns come in seven sizes, XS to 3XL, and you choose by hip. The skirt's finished length runs from 22 inches in XS to 23½ inches in 3XL. The shorts have 8 inches of ease at the hip for a relaxed fit and a 3 inch inseam. You can lengthen either one on the marked line.
Common mistakes to avoid
- Twisting the elastic. A twist inside the casing gives a rope-like lump. Check the elastic lies flat all the way around before you join the ends.
- Losing the end in the casing. Pin the trailing end to the fabric edge so it cannot slip inside while you feed the other end through.
- Making the casing too narrow. If the casing is the same width as the elastic, it will not slide. The extra ¼ inch is what lets it move.
- Stitching through the elastic. Sew the casing before you thread the elastic, and only stitch the elastic when you join the ends.
- Letting the elastic roll. Stitch a second line ¼ inch below the top fold of the casing. This holds the elastic in place and stops it turning over.
- Forgetting the gap. If the casing is sewn shut, there is no way to thread the elastic. Mark where the gap sits before you start sewing.
What should you sew next?
Once the waistband feels easy, try more projects from the free sewing patterns list. If you are building a first set of skills, easy sewing projects for beginners puts the simplest makes in order, and seam allowance explained covers the margin you sew along. The Barrel Pants pattern is a step up, and its pocket bag can be added to the skirt before you sew the side seams.

 How to sew a wine bottle gift bag (lined drawstring)6 min read
 How to sew a zipper pouch: free pattern in 3 sizes6 min read
 How to sew a microwave bowl cozy (free pattern)5 min read
 How to sew a drawstring bag (free pattern)5 min read