Sewzy
To make an embroidery hoop Christmas ornament, stitch a small design on cotton or linen in a 3 or 4 inch hoop, trim the fabric to about ¾ inch past the hoop, gather it to the back with a running stitch, cover the back with a felt circle and tie a ribbon loop through the hoop screw. The hoop stays on as the frame. A simple design like a name, a tree or a snowflake takes about an hour, and the finishing about 15 minutes.
TL;DR
- Hoop: 3 or 4 inch wooden hoops are the classic size for tree ornaments. 5 inch makes a door or gift-tag ornament.
- Fabric: woven cotton, linen or a cotton-linen blend. Red, green, cream and small plaids look festive.
- Design: keep it small and bold: one word, a name, a year, a tree, a star or a snowflake.
- Back: gather the extra fabric with a running stitch, then glue or blanket-stitch a felt circle over it.
- Hang: a ribbon or twine loop through the hoop screw, with a small bow on top.
What size hoop for an ornament?
| Hoop | Use | Fits | Fabric to cut |
|---|---|---|---|
| 3 in | Small tree ornament | A short name, initial, star or single snowflake | 6 x 6 in |
| 4 in | Standard tree ornament | A name and a year, a small tree, a short word | 7 x 7 in |
| 5 in | Door, gift topper or feature ornament | A short phrase or a scene with two or three motifs | 8 x 8 in |
Cut the fabric big enough to reach past the hoop on all sides, so you can pull it tight while you stitch. You trim it down at the end. Small hoops are fiddly to hold, so some people stitch in a larger hoop and move the finished piece into the small hoop for display.
What you need
- A 3 to 5 inch embroidery hoop with a screw at the top.
- A square of woven cotton or linen.
- Embroidery floss, needles and small scissors.
- A water-soluble pen or sticky water-soluble stabilizer to transfer the design.
- Felt for the back, a little smaller than the hoop.
- Ribbon or twine for the hanging loop, about 8 inches.
- Craft glue or fabric glue, if you glue the back.
If you are new to embroidery, start with the short kit in embroidery supplies for beginners.
How to make an embroidery hoop ornament, step by step
- Draw the design. Draw or print it smaller than the inside of the hoop, leaving at least ½ inch clear all round. A design that touches the hoop edge gets hidden under the ring.
- Transfer it. Center the design on the fabric and trace it with a water-soluble pen, or use sticky stabilizer on dark fabric. Both are explained in how to transfer an embroidery pattern to fabric.
- Stitch. Hoop the fabric tight and stitch the design. Backstitch, French knots, lazy daisy and satin stitch cover almost every Christmas motif. They are all in embroidery stitches for beginners.
- Rinse and press. Rinse out the pen or stabilizer in cool water and let it dry. Press face down on a towel so the stitches stay raised.
- Re-hoop for display. Put the finished piece back in the hoop with the design centered and the screw at the top, in line with the top of the design. Pull the fabric smooth and tighten the screw firmly.
- Trim. Turn the hoop over and trim the extra fabric to about ¾ inch from the hoop, all round.
- Gather the back. Sew a running stitch around the trimmed edge with strong thread, pull it so the fabric folds in over the inner ring, and knot it.
- Cover the back. Cut a felt circle just smaller than the outer ring. Glue it over the gathered fabric, or pin it and sew it on with a blanket stitch for a glue-free finish.
- Add the loop. Thread ribbon or twine through the hoop screw, knot it into a loop and add a small bow at the top if you like.
Christmas design ideas for beginners
| Design | Stitches | Time to stitch |
|---|---|---|
| A name or initial | Backstitch or split stitch | 20 to 40 min |
| Name and year | Backstitch, with the year smaller | 30 to 60 min |
| Simple tree | Backstitch outline, French knot baubles, a star of straight stitches | About 1 hr |
| Snowflake | Straight stitches and lazy daisy, on blue or dark fabric | 30 to 45 min |
| Holly sprig | Satin stitch leaves, French knot berries | About 1 hr |
| "Joy", "Noel" or "Merry" | Chain stitch or split stitch in 3 strands | 30 to 60 min |
Times depend on the size and your speed; these are rough guides for a 3 or 4 inch hoop. For names and words, the tips in how to embroider letters and names help a lot: short stitches on curves, and letters at least ¾ inch tall in a small hoop.
Finishing the back: glue or stitch?
Glue is quicker and gives a flat, neat back, which suits ornaments that only hang on the tree. Craft glue or fabric glue both work; let it dry before you hang it. A stitched felt back takes a little longer but needs no glue, and you can take the piece out of the hoop later. Either way, keep the gathered fabric smooth so the felt sits flat. A small square of card under the felt makes the back extra firm, which helps a 5 inch ornament keep its shape.
A sewn alternative: stuffed fabric ornaments
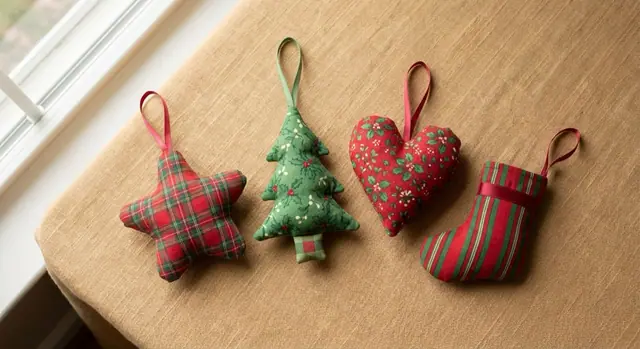
If you would rather sew than frame, stuffed fabric ornaments are just as quick. The Sewzy Christmas Ornaments pattern makes star, tree, heart and stocking shapes in Mini (3 in) and Classic (4½ in), with a hanging loop, an optional ribbon cuff and an optional stitched name or year. It is a beginner pattern of about 30 minutes, and the step-by-step photos in the Sewzy app take you from cutting to closing the gap. Our fabric ornaments and advent calendar guide has more on it.
Making a set to give or sell
Hoop ornaments work well in batches. Trace all the designs first, stitch them one after another, then do all the finishing in one go. A name ornament for each family member, or a year ornament for a new baby or a first Christmas in a new home, makes a small, personal gift. If you plan to sell at a craft fair, see Christmas sewing projects to sell, and for more small makes, stocking stuffers to sew.
 Winter sewing projects: 14 cozy things to make6 min read
 Gifts to sew for men: 10 things he will actually use6 min read
 How to sew a baby bib (free pattern)5 min read