Sewzy
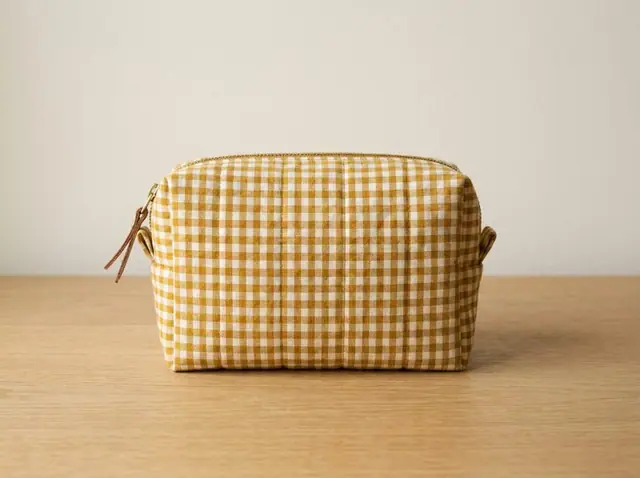
To insert a centered zipper, baste the seam closed along the opening, press it open, then lay the zipper face down over the pressed seam and pin it. Switch to a zipper foot and topstitch down one side, across the bottom and up the other side, then unpick the basting so the zipper shows. A zipper foot is what lets you sew close to the teeth and keep the line neat.
TL;DR
- A centered zipper is the easiest type to start with, and goes into any straight seam.
- Baste the seam shut first, press it open, then stitch the open zipper to the seam from the right side.
- A zipper foot lets the needle sew close to the teeth without hitting them.
- Match the zipper length to your pattern, or buy a longer one and trim it.
- The most common mistake is sewing with the pull in the way, which makes the stitching wobble.
What you need to sew a zipper
- A zipper: a nylon coil zipper is soft, cheap and easy to sew. Get the length your pattern asks for, or a longer one you can shorten.
- A zipper foot: a narrow foot that sits to one side of the needle. Almost every machine comes with one.
- Matching thread and a sharp or universal needle, size 80/12 for cotton. For heavier fabric see the needle and thread guide.
- Pins or clips and a seam ripper for the basting.
How do you sew a centered zipper, step by step?
- Finish the seam edges. Zigzag or overlock the two edges that will hold the zipper so they do not fray.
- Sew the seam in two parts. With right sides together, sew the seam below the zipper opening at your normal 2.5 mm stitch length and backstitch where the opening begins, so the seam is permanent.
- Baste the opening closed. Switch to a long basting stitch (about 4 mm) and sew the rest of the seam along the opening, with no backstitching. This temporary seam holds the fabric flat while you sew the zipper in.
- Press the seam open. Lay the seam allowance flat to each side and press. A flat, open seam is what keeps the zipper straight.
- Center the zipper face down. Open the zipper, place it face down over the pressed seam so the teeth sit right on the seam line, and pin or tape it in place. The pull should point to the top of the opening.
- Fit the zipper foot. Attach the zipper foot and move the needle so it sews about ¼ inch from the center seam, down the side of the teeth.
- Topstitch the first side. Starting at the top, stitch down one side of the zipper. When you reach the pull, stop with the needle down, lift the foot and slide the pull up behind the foot, then carry on.
- Pivot and cross the bottom. At the base of the opening, stop with the needle down, pivot, sew straight across below the zipper stop, pivot again and come back up the second side.
- Unpick the basting. Turn to the right side and slide a seam ripper under the basting stitches over the zipper. Pull them out and the zipper opens.
- Press gently. Press from the back with a cloth over the zipper. Nylon coil can melt under a hot iron, so keep the heat low.
Which type of zipper should a beginner use?
There are three common ways to put in a zipper. Start with the first one.
| Type | Where it is used | Difficulty |
|---|---|---|
| Centered | Cushions, bags, center-back dresses | Easiest |
| Lapped | Skirts, pants, side seams | Medium |
| Invisible | Dresses and skirts where no stitching should show | Needs a special foot |
A lapped zipper is sewn so one side of fabric covers the teeth, which hides the pull. An invisible zipper uses a special invisible zipper foot that rolls the teeth open so the stitching sits right against them and nothing shows from the front. Both build on the same basting and pressing steps above.
How do you shorten a zipper?
If your zipper is longer than the opening, you can cut it down. Close the zipper and mark the new length from the top. For a nylon coil zipper, open it, sew a bar of close zigzag stitches by hand or machine across the teeth at the mark to make a new bottom stop, then cut the extra length off about ½ inch below the bar. Always make the new stop at the bottom end and never cut above it, or the pull slides off the end.
The easiest first project with a zipper
The simplest place to practice is a flat pouch, because the zipper goes in before the bag is shaped. The free Sewzy Zipper Pouch pattern walks you through a zipper in three sizes, and the zipper pouch guide shows each step. The pouch is the same centered method on a small scale, which makes it a good place to practice before a garment.
Common mistakes
- Sewing past the pull. If you stitch next to the closed pull it pushes the line out. Always open the zipper and move the pull out of the way with the needle down.
- Skipping the basting. Pinning the open zipper without basting the seam first lets it shift, so the two sides end up uneven.
- Using a regular foot. A standard foot cannot get close to the teeth. Fit the zipper foot so the stitching lands an even ¼ inch from the center.
- A hot iron on the teeth. Nylon coil melts. Press from the back with a cloth and keep the heat on the wool or low setting.
- Wrong needle for the fabric. On denim or canvas use a bigger needle so it does not skip or bend. See the beginner fabric guide for what sews easily.
Once the centered zipper feels easy, a lapped zipper in a skirt is the natural next step.
 How to sew a santa hat: sizes, steps and fabric6 min read
 How to fix skipped stitches on a sewing machine6 min read
 How to sew an envelope pillow cover (no zipper)5 min read
 How to hem pants by hand and by machine6 min read