Sewzy
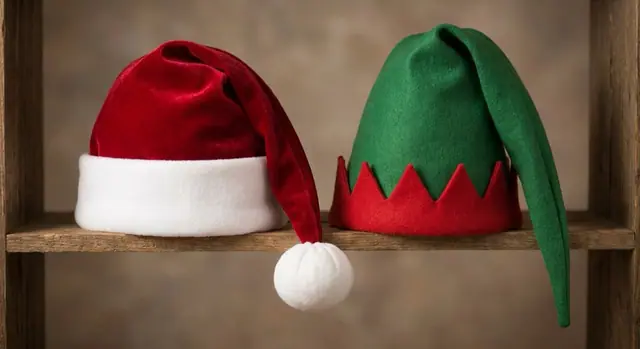
To sew an elf hat, cut a tall cone and a contrast band, sew the cone's seams into a point, add a turned-up brim or cuff, then sew a pom-pom to the tip. The Sewzy pattern makes both an elf hat and a Santa hat, in sizes from toddler to adult large, and takes about an hour.
TL;DR
- Time: about an hour. Difficulty: beginner.
- Sizes by head: toddler (18 to 19½ in), kid (19½ to 21 in), adult (21 to 22½ in), adult large (22½ to 24 in).
- One pattern makes the elf hat and the Santa hat.
- Felt or fleece holds the cone's shape best; add a contrast cuff and a pom-pom.
- The Santa and elf hat pattern is in the Sewzy app, with every size.
What makes a hat an elf hat?
An elf hat is a tall, floppy cone with a turned-up contrast brim and a pom-pom at the tip, usually in green and red or green and white. A Santa hat uses the same cone with a wide white cuff instead. Because the shapes are so close, the Sewzy pattern cuts both from one set of pieces, so you can make a matching family of hats from the same steps.
What you need
- Main fabric: felt or fleece in green or red holds the cone upright. Quilting cotton works for a softer, floppier hat.
- Contrast fabric for the brim or cuff, and a scrap for the pom-pom, or a ready-made pom.
- Thread to match.
- The fabric amounts for each size are in the Sewzy app.
Measure around the head where the brim will sit and pick the size from the chart:
| Size | Head measurement |
|---|---|
| Toddler | 18 to 19½ in |
| Kid | 19½ to 21 in |
| Adult | 21 to 22½ in |
| Adult large | 22½ to 24 in |
How to sew an elf hat step by step
- Measure and print. Measure the head, then print and tape the pattern in your size.
- Cut. Cut the cone pieces from the main fabric and the brim ring from the contrast.
- Sew the cone. Sew the cone seams right sides together so it forms a tall point. Clip the curved seams so they lie flat.
- Make the brim. Sew the brim into a ring, then sew the ring to the bottom edge of the hat.
- Add the cuff. Close the cuff ring, sew its points, and sew the cuff to the hat so it turns up at the front.
- Pom-pom. Make the pom-pom and stitch it firmly to the tip of the cone. Your elf hat is finished.
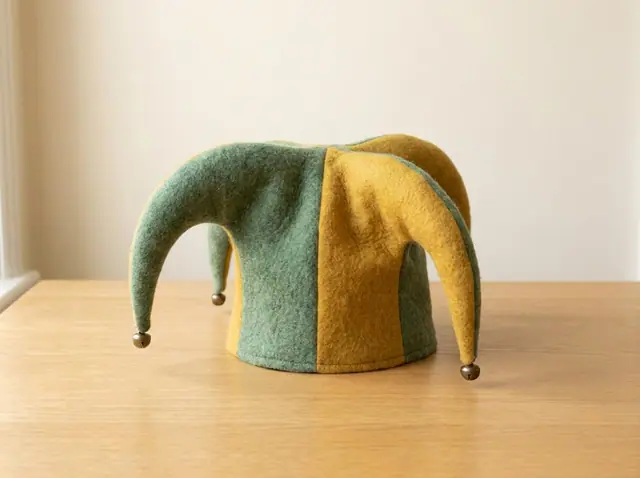
Sewing a cone with clipped seams is the same skill used in the jester hat, which has two or three points instead of one.
Common mistakes to avoid
- Floppy fabric for a standing cone. If you want the hat to stand up, use felt or fleece. Quilting cotton gives a soft hat that leans over, which also suits an elf.
- Skipping the clips. Clip the curved cone seams before turning so the point is smooth, not lumpy.
- A loose pom-pom. Stitch the pom through the tip several times. For a toddler, make sure it cannot be pulled off.
- Wrong size. Measure the head first. A hat that is too small rides up off the ears.
How do you make the pom-pom?
You can buy a ready-made pom or make one from yarn or a scrap of the cuff fabric. For a yarn pom, wrap yarn around a fork or a small piece of card until it is plump, tie it tightly through the middle, cut the loops open, and trim it into a ball. For a fabric pom, gather a circle of fabric around a little filling and cinch it closed. Stitch the pom to the very tip of the cone through its tie so it cannot work loose.
Fitting the hat
Measure around the head where the brim will sit, just above the ears, and choose the size that matches the chart. The brim should feel snug but not tight. If you are between sizes, go up, since a cone has room to spare at the top. For a child who is still growing, the larger size with the brim folded a touch deeper will last longer.
Elf hat, Santa hat or jester hat?
All three start from a cone. An elf hat has one long point and a turned-up brim. A Santa hat is the same cone with a wide white cuff and a pom. A jester hat splits into two or three points, each with its own pom or bell. Once you have sewn one, the others follow the same path, so a single evening can turn out a themed set.
Make a set for the whole family
Because one pattern covers toddler to adult large, you can sew matching hats for everyone. Switch the cuff to a wide white band and you have a Santa hat; our how to sew a Santa hat walks through that version. For more December makes, see the Christmas sewing projects and the Christmas patterns. For dress-up all year, the jester hat and the fabric crown are in the same costume family.
 Winter sewing projects: 14 cozy things to make6 min read
 How to sew fabric Christmas ornaments (4 shapes)6 min read
 Gifts to sew for men: 10 things he will actually use6 min read
 How to sew a baby bib (free pattern)5 min read