Sewzy
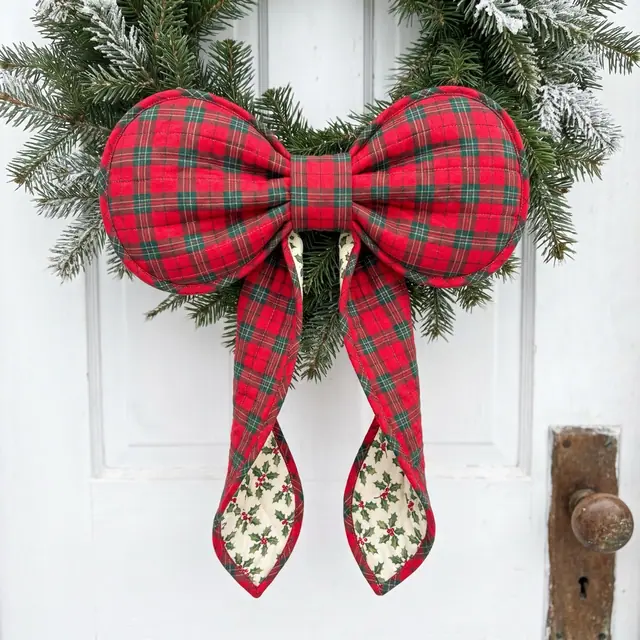
A quilted bow is made from padded, channel-quilted pieces: two loops, two tails and a knot, each sewn from two fabrics with batting inside. You sew and turn each piece, quilt lines along it so the loops puff, pleat the loops together at the center, add the tails and wrap the knot around them. The Sewzy Quilted Bow comes in Mini (about 5 inches wide), Medium (about 9 inches) and Large (about 14 inches), and takes about an hour at beginner level.
TL;DR
- Sizes: Mini about 5 in wide for hair clips and gifts, Medium about 9 in for bags and the tree, Large about 14 in for wreaths and doors.
- Fabric: two coordinating quilting cottons, A and B. Christmas plaids, velvet-look cotton and metallic quilting cotton all work.
- Batting: thin cotton or fusible fleece for Mini, cotton or 80/20 for Medium, polyester loft for the puffiest Large bow.
- Time: about 60 minutes, beginner level. No hand-sewn gaps: an edgestitch closes them.
- Attach: an alligator clip, a pin back, a chenille stem or floral wire, depending on where it goes.
Quilted bow sizes and fabric
| Size | Finished width | Fabric (each of A and B) | Batting | Best for |
|---|---|---|---|---|
| Mini | About 5 in | 3 charm squares | Thin cotton or fusible fleece | Hair clips, gift toppers |
| Medium | About 9 in | 2 layer-cake squares | Cotton or 80/20 | Bags, Christmas tree |
| Large | About 14 in | 1 fat quarter | Polyester loft | Wreaths, front doors |
Charm squares are 5 inch precut squares and layer-cake squares are 10 inch precuts, so the Mini and Medium are a good use for a precut bundle or scraps. The ¼ inch seam allowance is included on every piece.
What fabric is best for a quilted bow?
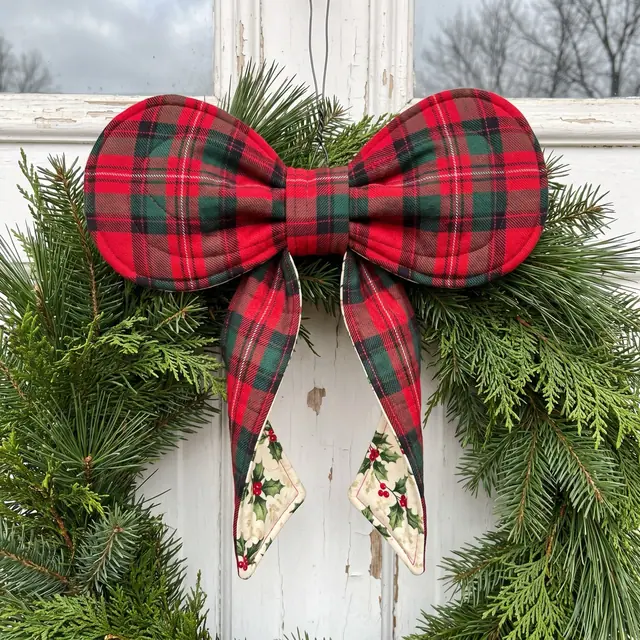
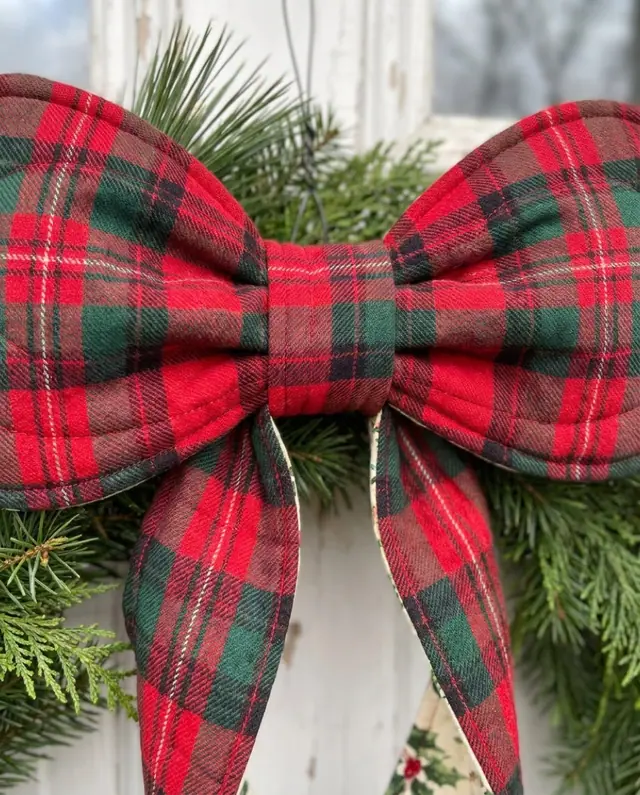
Quilting cotton is the easiest, and cotton lawn or a light linen blend also work. Pick two fabrics that go together: A shows on the front of the loops, and B shows as the tails twist, so a contrast or a tiny plaid on B looks good. For Christmas, red and green plaids, velvet-look cotton or a metallic quilting cotton give a festive look. Choose the batting by the size: thinner for the Mini so it stays neat, loftier for the Large so it puffs up and reads from across the room.
What you need
- Fabric A and fabric B, and batting, as in the table.
- Thread, a hand needle and a washable marking pen.
- A walking foot, which helps the quilting channels feed evenly, and a chopstick for turning.
- An attachment: an alligator or snap clip, a pin back, a chenille stem or floral wire.
How to sew a quilted bow, step by step
These are the 10 steps of the Quilted Bow pattern in short. If you have not printed a PDF pattern before, read how to print PDF sewing patterns first.
- Cut. Print your size and cut the paper pieces. Choose the tail end: angled, or a dovetail V. From fabric A, fabric B and batting cut 2 loops, 2 tails and 1 knot each. Mark the gap notches and the quilting lines on the fabric A pieces.
- Stack. For every piece: batting at the bottom, fabric A on it right side up, fabric B on top right side down, edges matching. Pin or clip.
- Sew and trim. Stitch ¼ inch all round through all three layers, leaving the gap between the notches open, and backstitch at both notches. Trim the batting close to the stitching, clip the corners and trim the tips. For a dovetail, clip right into the V without cutting the stitches.
- Turn and edgestitch. Turn each piece right side out through the gap, so the batting is inside. Push the corners out with a chopstick and press. Tuck in the gap edges and edgestitch ⅛ inch all round, which closes the gap with no hand sewing.
- Quilt the channels. With a walking foot and a 3 mm stitch, sew along the marked quilting lines from end to end. The lines fan out along the loop, which is what makes the loop tips puff. Sew every line in the same direction so the piece stays flat. The knot is not quilted.
- Fold the loops. Fold each loop in half at the loop tip line, so both ends meet. Either fabric can be on the outside, since both sides are finished. Lay the two folded loops end to end, overlapping ½ inch at the center, tips pointing left and right.
- Pinch the center. Pleat the stacked center like an accordion into 3 or 4 folds, about 1 inch deep for Mini, 1½ for Medium and 2 for Large. Wrap strong thread three times around the pleats and knot it, or use a zipper tie, then stitch through once to lock the pleats.
- Add the tails. Lay the two tails behind the pinched center, tops overlapping ½ inch, angled out in an upside-down V. Hand-stitch them to the back of the pleats.
- Wrap the knot. Wrap the knot piece around the center, over the pleats and the tops of the tails, with the ends overlapping at the back. Pull it snug and whipstitch the overlap. For a clip or pin back, leave the knot a little loose at the back so the hardware slides in.
- Attach. Mini: slide a 2 inch alligator clip under the knot, or sew on a snap clip. Medium: sew a pin back across the back of the knot, or thread a chenille stem under it and twist it around a branch. Large: thread 12 inches of floral wire under the knot, twist it around the wreath frame and tuck in the ends.
Tips for a puffy, even bow
- Sew in batches. Sew and quilt all the pieces assembly-line style, then shape the bows. It is much faster when you make several.
- Lengthen the quilting stitch to 3 to 3.5 mm. A longer stitch keeps the channels from puckering.
- For a stiffer wreath bow, add a layer of fusible fleece to fabric A of the loops before stacking.
- For shapeable tails, slip a length of floral wire into each tail before edgestitching, about ½ inch inside the edge.
- For a flat gift topper, skip the hardware and stick the bow to the box with a glue dot.
Where to use a quilted bow
A Large bow on a wreath or a front door, a Medium one at the top of the tree or on a bag strap, and a Mini on a hair clip or a gift box. A set of Medium bows down a staircase garland looks lovely, and Mini bows are a quick make for a craft fair table. For more ideas, see Christmas sewing projects, Christmas sewing projects to sell and scrap fabric projects. To wrap gifts in fabric too, see reusable fabric gift bags.
Care
Spot clean, or hand wash in cool water and reshape while damp, then air dry. Press lightly on the back with a press cloth. Store the bows flat or stuffed with tissue so the loops stay round until next Christmas.
The full pattern, with printable pieces for all three sizes and photos for each step, is in the Sewzy app. It is a Premium pattern.
 Winter sewing projects: 14 cozy things to make6 min read
 Gifts to sew for men: 10 things he will actually use6 min read
 How to sew a baby bib (free pattern)5 min read